What
are the advantages of marking the Queen What
are the advantages of marking the Queen |
How
do you mark her? |
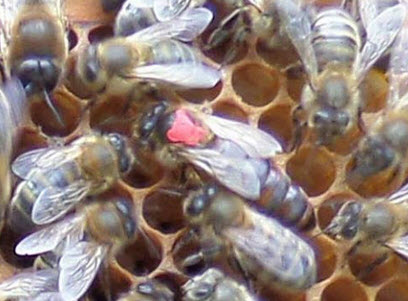
| A marked queen is so much easier to find.
Having found her, you can put that particular frame to one
side, then relax a bit whilst examining the remainder of the
colony. |
Just hold her gently between your thumb and index finger,
then dab a small spot of colour marker onto the thorax. Hold her for
a minute or so in order for the paint to dry, then release
her into the hive. (See below Posca marker pen)
|
| There is then less chance of accidentally
injuring her. |
If you are a bit nervous about doing this,
why not pick up a few Drones first and practice painting on
them. |
| You will know that she has not been
replaced. |
Be very careful not to get the marker solution on her
eyes, wings, legs or antenna. |
| You will know her age. |
You can buy a kit
using glue and small numbered stickers instead. |
If you have an observation hive, you will
want everyone to see her.
|
There is also a tube you can either buy or
make into which you place the Queen to avoid touching her.
(Check out your catalogues/beekeeping agants for further details.) Also, see pic below)
|
The marking pen is produced with a water based evaporator.
The pen is easy to use, as it can be used with one hand, just place a small dot on the Queen's thorax. Keep to the international Beekeeping Colour code and you'll know how old your queen is! |
|
Keep to the international Beekeeping Colour code and you'll know how old your queen is. Carry the pen in your beekeeping suit for convenience. 1.8 - 2.5mm bullet shaped tip makes this brand leader a firm favourite with beekeepers.
Water based, quick drying and non-toxic.
Warning: DO NOT use Tipex or Nail Varnish as the workers will probably in my experience 'ball' and kill the Queen! |
 |
|